Tripwire guide
The very first steps
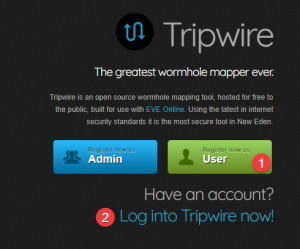
1 Initial login screen
First you have to Register as a User via the EVE SSO authorization process.
Next, in order to actually see and use the tool itself, you will use the "Log into Tripwire now!" button and again, you will log in through the EVE SSO authorization.
!! Use the account on which you have the characters/pilots that belong to the proper corporation !!
2 First contact
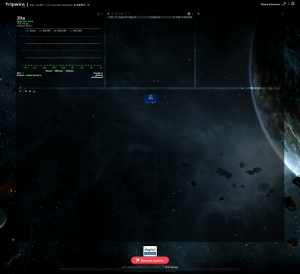
This is the page that will be presented to you after logging in for the very first time. Each module (except the map ) has a small "?" symbol that will run a small tutorial for you about the corresponding module if you click it.
Before you can actually use the data that has been added by your fellow team-mates and consequently add your own data, you will need to set up a few things.
At some point, you might want however to re-organize the position and size of modules, which you can do by clicking the third button in the top right corner of the webpage. Once you are done, click it again and hit refresh.
![]()
3 Use the correct mask
In the top right corner of the webpage there is the settings button: ![]()
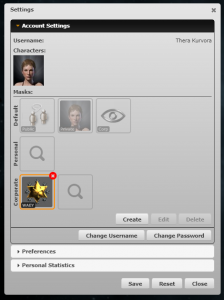
Under the "Account Settings" section you can find the Masks, which are the bread and butter of how Tripwire works. They are basically the maps themselves.
Different masks can be shared to different people/groups. Signatures or comments added to one mask does NOT show up in other masks, so the masks are completely separate from one another.
Everyone can create masks and share them, but in order for a mask, that has been shared for a corporation, to be actually visible for those members, the corporation Director or CEO has to search and activate it for their corporation/members.
For WAEY members, we will be using the corporate WAEY shared mask (first mask from left to right on the bottom row). Select it and hit "Save".
Whenever you change a mask, remember to click "Save" in order for the mask to actually be selected and functional.
4 Recommended map settings
These are the settings you should have in order for everyone to see and understand the mapping processing in the same way.
1. Show Chain Map Gridlines --> "Yes"
2. Chain Map Node Reference --> "Signature ID"
3. Show sig name on map -> "Reference - prefix"
4. Signature Add Dialog default type -> "Unknown"
5. Signature paste default life -> "72 hours"
The "Show Route as Blobs up to" will define how many colored squares you will see routed towards your favorited systems, on the nodes that are K-space exits attached to the chain. Generally 10-15 jumps should be enough to decide if that exit is good or not, but this is a matter of personal preference really.
The K-space route selection is also something that you can decide for yourself. Tama, Rancer are added by default but you can consider adding Uedama and Ahbazon as well.
5 Character tracking
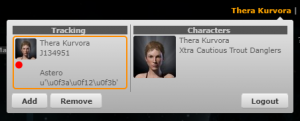
In the top right corner, near the cogwheels, clicking your name will open the window that allows you to add a character that you wish to track on the map.
This step is very important because without it, the mapper can't see when you change systems or you location for your corp mates to see. The little "A"-lettered square in the top right corner of the signature module will be yellow when tracking is active.
Obviously, your tracked character needs to be logged in for it to work!
NB: you can add all your alts and it will track them on the map. However, you can't track one account across multiple masks at the same time.
6 Anchor your home system
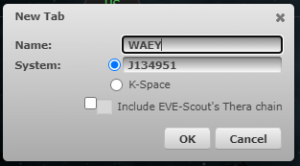
In the top left corner of the map module, click the "+" sign in order to add a map tab.![]() These tabs will have at the very start the system you select when creating the tab itself and they basically anchor the system at the top.
These tabs will have at the very start the system you select when creating the tab itself and they basically anchor the system at the top.
You can have multiple tabs to switch between or in other words, you can anchor different systems and view the map tree starting from them.
Make sure to click/select the tab after you created it!! A working tab will have a blue bar under the name, to indicate it is active: ![]()
7 Add trade hubs for routing
In Tripwire you can select systems as favorites by simply selecting/searching for the system and then clicking the little star to the right of it.
After you have added a system in your favorite list, you can toggle the routing view towards those systems by clicking the star icon located in the map module: ![]()
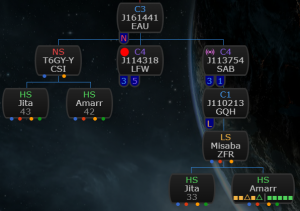
The mapper will add the favorited systems to the k-space exits and show you a route via colored squares, similar to the ingame route planner (depicted in the picture to the right). The small vertical line between the squares is simply a 5j ruler/indicator.
If you search for a specific system and have it selected, you can toggle the small "eye" button next to the star button to calculate a route to the current selected system. This only works for k-space systems only!!
NB: You can also see the routes under the selected system window: 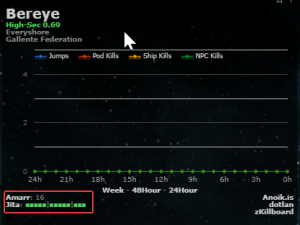
Understanding the mapper
1 Adding a signature
You can add signatures by simply copy/pasting them from the game. Start by selecting the signatures in the probe scanner window with CTRL+A followed by CTRL+C. Then go to your browser/Tripwire window and press CTRL+V to add them. A small delay will follow while the map processes your copied list.
Afterwards, a little blue popup will appear on the top right corner of the screen, asking if you want to delete signatures that are not present. Be careful with this since if you have ignored a signature in game it will not copy and will be deleted.
There's a Undo/Redo functionality you can try in the signature module, if you mess up. Keep in mind it usually hasn't been working that well.
NB: You can also add signatures manually by clicking the "+" sign in the very top left corner of the signature module.
2 The node
The main element of Tripwire mapping is called a "node". They will be attached to the map once a wormhole signature has been copied to your current system's signature list, inside the signature module. Populating the node with the correct system name will only happen once the wormhole signature has been updated, see the next step.


The numbers/letters attached to the bottom of the j-space node are the statics. If you hover over the small colored dots under the k-space system, you will see, from left to right: jumps, pod kills,, ship kills, NPC kills.
The connection types are either colored and full/dashed, the meaning of which you can view in the legend, by hovering over the small tree like symbol in the top left of the map module: 
Medium connections are not depicted so you will have to remember that medium sized wormholes can only come from C1 class wormhole systems, because C1 wormholes can only be medium or small!!!
3 Updating a signature
In Tripwire no connection will be shown if there's no corresponding wormhole signature for it. Also deleting a connection happens only by deleting the signature corresponding wormhole signature.
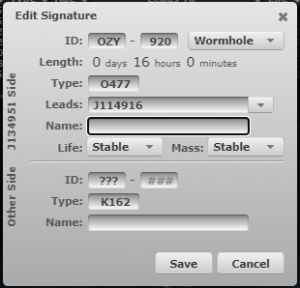
You can edit a signature by selecting it in the list and clicking "pen" icon, double clicking the signature or clicking the wormhole type in the map.
In Tripwire it's even more important than in Pathfinder to fill in the wormhole types and where they lead to. If you have not filled in the type the wormhole lifetime will not work correctly. Default value for the signatures is 3 days (Can be changed from preferences, see step 4 of the previous section).
You can manually set the lenght by clicking the days/hours/minutes and using your arrow keys to set the correct time.
If you do not add where the wormhole leads to, you will not be able to select the system to continue adding signatures. If you are tracking your scanner the first system in the "leads to " drop down menu is your current system.
When you enter a wormhole type that is not a K162 type the K162 will be automagically filled in as other side type. But if you scan a K162 hole the other side will remain ??? until manually updated. You can use a visualization chart to recognize and fill the other side type. If you know what class system the wormhole is originating from, you know what type of a wormhole it is based on the class and the size.

